BEST Subwoofer for under $100? ISO 100 Build
This DIY $100 Subwoofer will SHAKE your House
Overview
There’s always been a lot of really good subwoofers. But most are really expensive. I wanted to make the best home theater subwoofer under for $100. Now when I say under $100, that is for the subwoofers themselves, not the entire build. But even finding a good home theater subwoofer for under $100 is really hard to do. Why? Well you really want a subwoofer to go really low, like 20hz low. But to find a subwoofer for under $100 that can do that, is near impossible…until now.
Design Goals
SO the design goal was to get the best subwoofer for under $100. In order for this to happen, it would need to tune flat (f3) to as close to 20hz as possible. It needed to be decent size and it had to get loud. After all when you are looking for subwoofer for home theater, even under 100, you want it to excite you. And you wouldn’t believe what I found out.
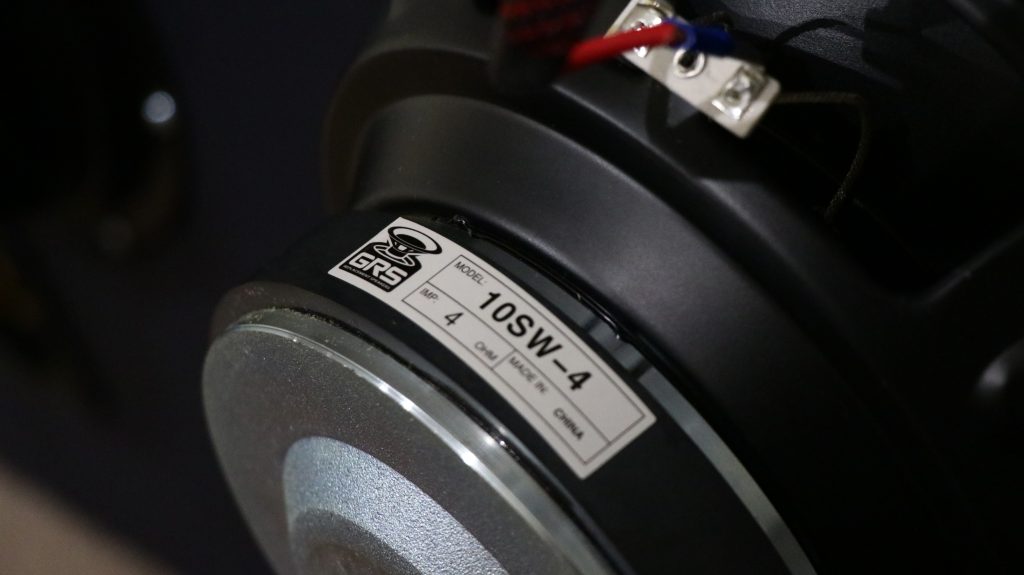
I looked at a lot of subwoofers under $100. BUt the best subwoofer under $100 was the GRS 10SW-4. It is a 10″ subwoofer that tuned really flat to 20hz. The best part…it’s only $20! Unfortunately, it fell short on betting loud and using a small box. It needed a 6 cubic foot box for just one of these subwoofers! Luckily, I know a trick. It’s called an Isobaric configuration.
Isobaric Configuration
Basically, if you take two of the GRS SW10-4’s and put them in a clamshell configuration (front to front facing) wire them out of phase, they will take up half the box space. Unfortunately, this does change the impedance to 8 ohm. Meaning you would end up needing a lot more power. And power isn’t cheap. But do you know what is? The GRS 10SW-4. For only $40 more or $80 total, you can get four of these subwoofer, use the same 6 cubic foot box, still get the low tuning and it will go really loud. This is definitely the best subwoofer for under $100. Or at least, the best I could find.
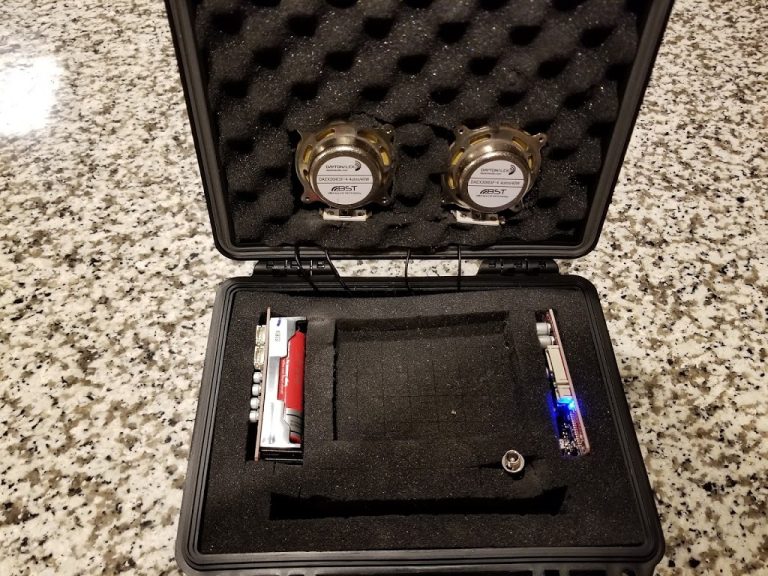
Parts Needed
- 4 – GRS 10SW-4 subwoofers
- 2 – 3″ Flared Ports – I used these, feel free to use what you have
- 2 Binding Posts – I used these, feel free to use what you have
- Amplifier can be any 100-400w amplifier. This is the one I used: spa250
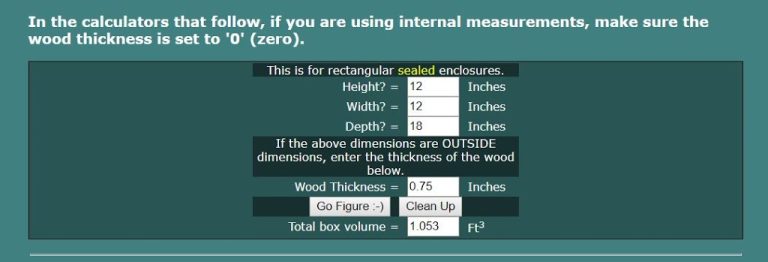
Box Dimensions and Cut List
Best Subwoofer under $100 – External Box Dimensions
- Height: 24″
- Width: 30″
- Depth: 18″
This box uses 3/4″ material.
Sample cut list:
- Front and Rear Baffle: 30″ x 24″
- Top and Bottom: 30″ x 16 1/2″
- Ends: 16 1/2″ x 22 1/2″
Ports
You will need 2 ports. If using the precision ports like I uses, you will cut the straight piece to 7″ and then glue the flares on. With flared ends, it’ll be about 13″ in total length. These are designed to be glued on with ABS plumbers glue. However, you can use superglue or any other type of glue. Just make sure their are no air leaks in the port. If you decide to use something else, like PVC pipe, a good guesstimate would be about 10″ long, However, since I didn’t do that, I can’t say for sure. I would recommend flaring the ports if you decide to make your own.


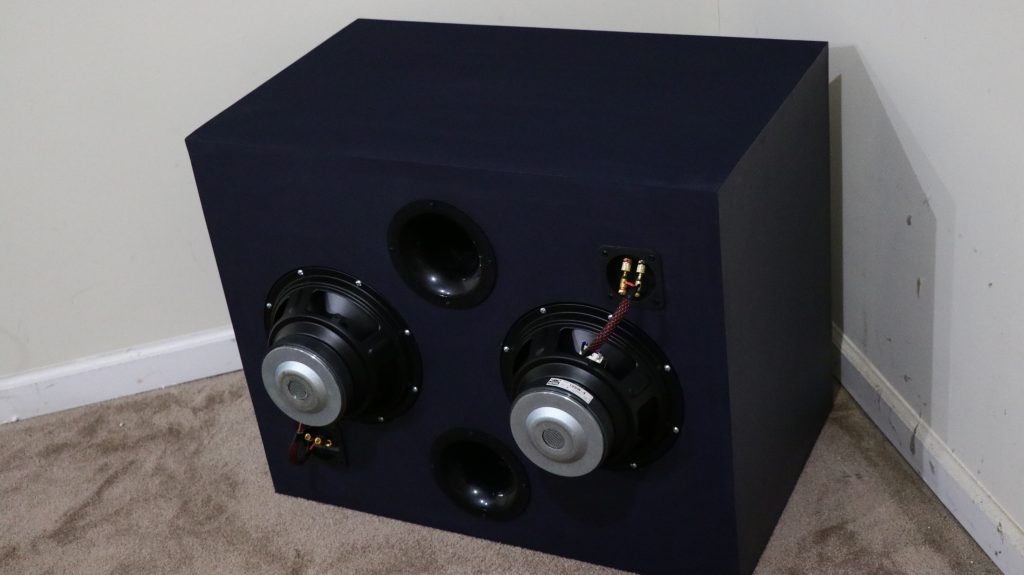


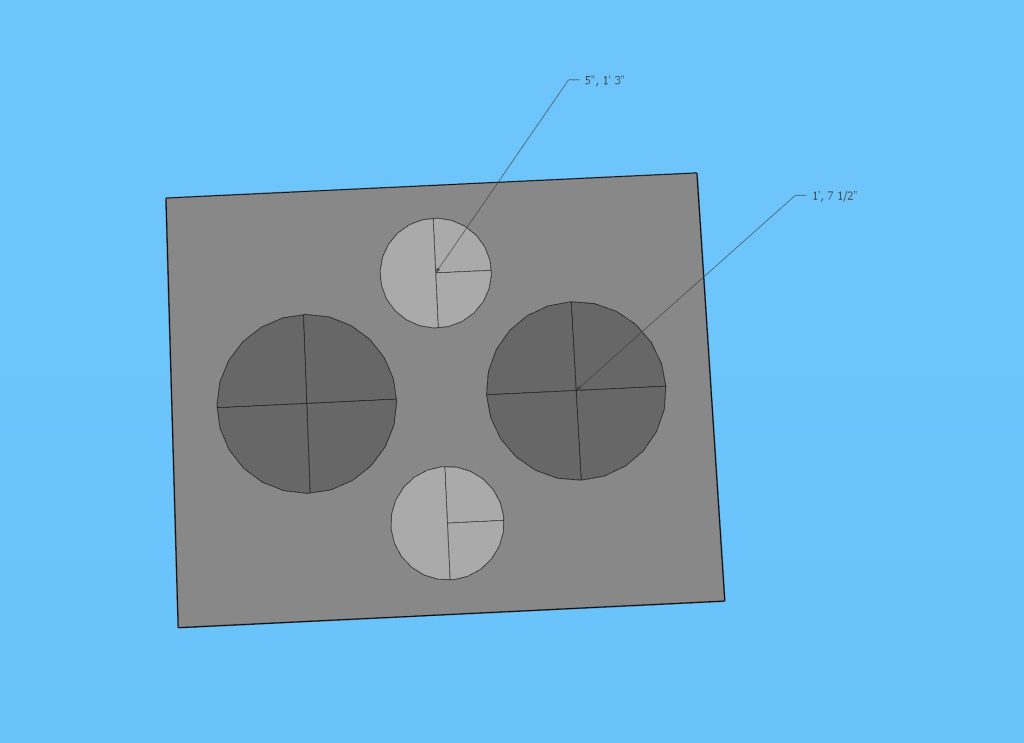
Speaker Cutouts and attachment for the Best Subwoofer under $100
I did recess the woofer so that it would sit flush. This will be important to do if you decide to turn it into an end table as it allows you to put on 6″ legs. Without this you will want to raise the legs up higher. Each woofer is placed 12″ from the bottom and 7 1/2″ from the side. The ports will be 5″ from the top or bottom and 15″ from the sides. You will need to line up the holes correctly so you can bolt the subwoofers together. I attach a bolt through a drilled hole then drill a second hole cattycorner to the first. After complete, attach another bolt. The woofer should no longer be able to move, then you can drill all the other holes without worrying about it moving. Just make sure to drill them directly down and not at an angle.
The easiest way to attach the woofers to the front baffle is to use bolts and nuts. I would recommend either locking nuts or double nuts to make sure they do not come loose. You can pick up bolts pretty cheap at your local hardware store. Places like Ace Hardware will sell them by the bolt, which is often times cheaper than buying them in bulk. I used 10-24 bolts that were 1 and 1/2″ long. Don’t use anything shorter. However, you could go longer. Something like 2″ long might make it easier. It would help, especially when starting the first nuts. You will need 16 of these bolts and nuts (32 nuts if you decide to double nut it).
Bracing
For the bracing I just use scarp from what I have cut that is the same size as the internal dimensions of the box. These strips I cut around 1.5″ wide using that 3/4″ scrap. I try to use 12 of these and make sure to glue them together. But you need to make sure you keep plenty of room to remove and install the subwoofers. Make sure they do not go over the ports or where the ports will be. I would wait to glue these in, until after the port were installed. For bracing you will want the following 1.5″ strips cut.
- 28.5″ long – 4 of these
- 22.5″ long – 4 of these
- 16.5″ long – 4 of these
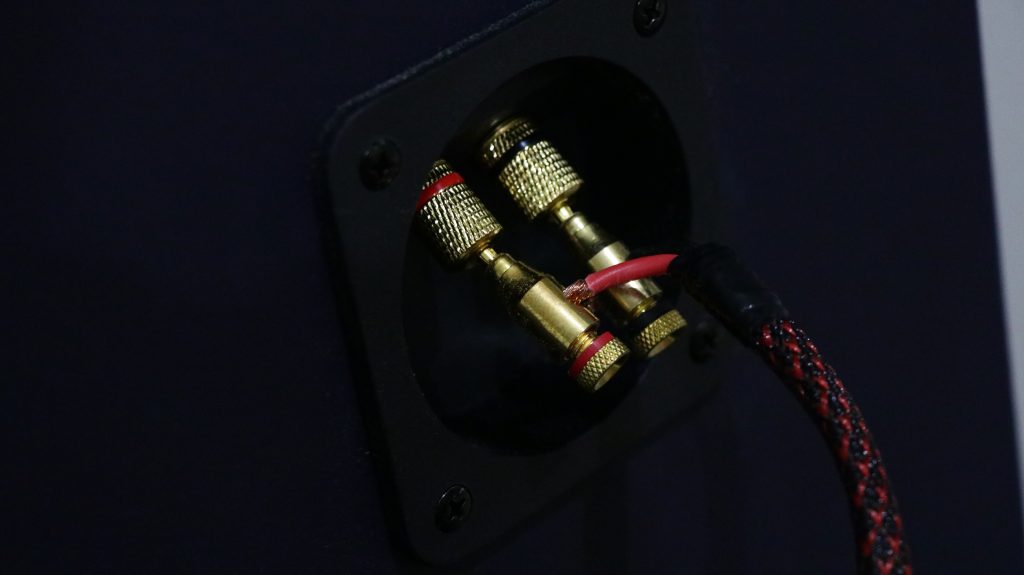
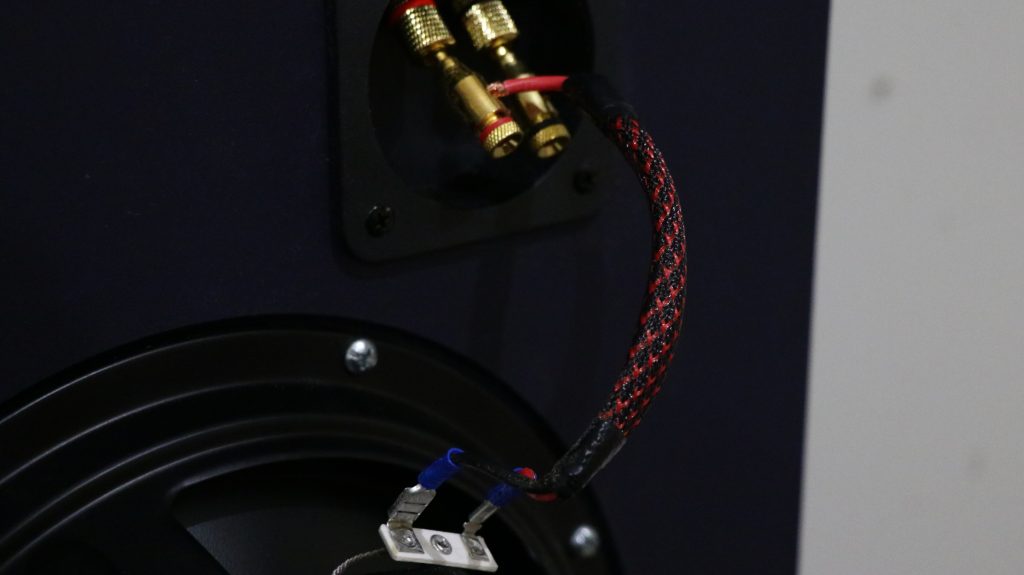
Wiring
Each pair of woofers will be wired parallel out of phase. This allows each woofer to move with each other. AKA when one is going in, the other is going out. On the inside of the box you will now have 4 wires that need to go to the amplifier. These will be wired in series to get to a 4 ohm load. The diagram below shows you how to do it, if you are unfamiliar with this terminology.

I used a terminal cup to pass the wires from the inside of the box to the outside of the box. You can use anything you want including binding posts. One thing to think about though, is making sure your wires will be close to your terminal cup. So when placing the woofers and screwing them down, pay attention to where you’ll be attaching those wires on the woofers.
Basic Assembly Directions
There really is no right or wrong way to assemble the best $100 subwoofer, but here is what I find the easiest. I glue all the sides on except the baffle opposite of the woofers (I’ll refer to this as the rear baffle). Then paint the front baffle where the woofers will be going. Once that is dry, I will attach the ports. Finally, mark the height of the subwoofer on the inside of the box.
Next you will move on to bracing. With bracing there are a few things to keep in mind. You want to leave room for you to be able to remove the subwoofers if you ever need to. So you do not want your bracing in a way that will impede that. Make sure to leave enough room you can later remove the woofers if necessary.
I typically glue in around 12 braces. Two going to each side. Glue these to each panel of the box and to each other. This will help the sides flexing and resonating. Keep in mind, you will not glue 4 of the braces to the rear baffle, since it still is not installed. Do not install these over the ports or in the way of your amplifier or subwoofers.
Once that is finished, I would install the drivers, make sure these are tight and secure. you can now wire these and install the terminal cups. Once that is complete you can glue on the rear baffle. I would glue this facing down, that way no glue will drip on to your woofers, ports or terminal cups. Once that is dry do your finish work and hook it up to the amplifier. Now you will officially have built the best subwoofer under $100.